Pages

Thursday, October 16, 2014

Home Alone


It’s mid-October and I am home alone with our little Toby. It’s been very quiet at home except when Toby decides to let his presence known by barking. But that doesn’t happen a lot. It’s as if he senses Mommy is enjoying this quiet moment at home and he has decided to cooperate. Daddy is in the office and MDK, well, he’s in the campus and probably taking his midterm exam as I am writing this. I miss MDK so much. The last time we spoke with him, he told us he’s having fun and is meeting a lot of great people. We’re happy for him.

I’m taking my time off from work. Shortly, MDH, Toby and I will go out of town for that much awaited break. And hopefully, we’ll get to meet up with some of our favourite friends before coming back and tackle the next hurdle. The hurdle will be mostly mine. 

Starting next month, I will not report for work. It will be so for the next while. But it’s all good as I will be in full time French Language training, learning a new skill. This had been planned years ago, but there was always something that popped up at work. It will be one-on-one with my teachers, a different teacher in the morning and another one in the afternoon. As I will be the only student and their time will be dedicated mostly to me learning to speak, read, and write in French 5 days a week, I am hoping the training will not take longer than 10 months. Je suis excite! 

So, what’s the pic got to do with all these ramblings? Except for that book (L’art de Paris) on the footstool which we bought for MDK during our trip to Paris last year and those macarons, there’s nothing remotely French in them.  But, but... I want you guys to look at that ottoman. You like? MDH and I made it. I had so much fun working on it, it made me think I may be in the wrong profession hahaha. Next project, headboard for the guest rooms. 

Wednesday, December 25, 2013

A Charlie Brown Christmas


Charlie Brown Christmas

This Christmas, I decided to get us a Charlie Brown Christmas Tree. Those of you growing up watching Charlie Brown know what the tree signifies. Which btw MDH jokingly pointed out to me that Charlie Brown may have become more depressed when they decided to market and sell his tree as it is quite contradictory to what the tree signifies hahaha. The tree was dirt cheap so I'm not feeling too guilty about it :) And for a minimalist, it's perfect!

So, before we get all caught up in all the hustle and bustle of the season, may we all take the time to reflect on what Christmas is all about.


Charlie Brown: I guess you were right, Linus. I shouldn't have picked this little tree. Everything I do turns into a disaster. I guess I really don't know what Christmas is all about. 
[shouting in desperation] 
Charlie Brown: Isn't there anyone who knows what Christmas is all about? 
Linus Van Pelt: Sure, Charlie Brown, I can tell you what Christmas is all about. 
[moves toward the center of the stage] 
Linus Van Pelt: Lights, please.

[a spotlight shines on Linus]

"And the angel said unto them, Fear not, for behold, I bring unto you good tidings of great joy, which shall be to all people. For unto you this day is born in the City of Bethlehem, a Savior, which is Christ the Lord. And this shall be a sign unto you; you shall find the babe wrapped in swaddling clothes and lying in a manger. And suddenly there was with the angel, a multitude of the heavenly host, praising God, and saying, 'Glory to God in the highest, and on Earth peace, good will toward men'". 
That's what Christmas is all about, Charlie Brown.


And what's a baking-obsessed gal like me do? Have a merry time in our kitchen baking some Christmas goodies, of course! This year's addition is this batch of sugar cookies. I gave them away to my colleagues. MDH brought some to his office to share as well.


028 ps1


Christmas Cookies

Clitter, clatter

Baking tins,

Cookie cutters,

Rolling pin.

Christmas cookies. Let's begin!
Sugar, flour, eggs, and butter -
Mixing bowls, a wooden spoon.
Round and round we turn the batter.
We'll have dough to roll out soon.
Cut the cookies with the cutters -
diamond,
circle,
crescent moon -
Pop them all into the oven


~ Author Unknown 


sugar cookies 2


As to this year's Christmas decors, I changed our stockings to off-white. I made them and so proud of how they turned out. I was going to share this DIY project but I didn't get to finish them 'til recently. Talk about photo-finish :) I'll share them next year, I guess.


stockings 1


Aren't they photogenic too? If you want to do this project for next year, don't throw away your old sweaters.


stockings 2


And what's a stocking without a stuffer, right? Someone sure has a M(ulb)erry Christmas this year. This is my gift to that one guy who deserves the best. Which is why I think he deserves me BWAHAHA.


024 ps1

Have a wonderful Christmas, everyone!

Tuesday, November 5, 2013

All ye craft mavens out there

Christmas is lurking around the corner. Halloween being over marks the start of my Christmas decoration planning. Us Canucks celebrate Thanksgiving earlier than our American neighbours. It's celebrated before Halloween and so once the ghouls and monsters are taken down, stars and snowflakes and angels and colourful lights can be put up. I know, I know. Christmas isn't all about decors. But it certainly helps build a festive atmosphere. And truth be told, it's that time of the year when I can go overboard with my decorations.

I'm not sure about you, but I want to put up something new and a bit different every year. It can be a new colour scheme, a new spool of ribbons, whatever. This year, I've decided to make Christmas tree ornaments. Combining my love for baking and my preference to customize things, I've made salt dough ornaments. I'm planning to make a few more batches to give away.

034 ps1


And because Christmas is about sharing (among other things), I've decided to share the how-to of this fun project. If you have a budding craft maven at home, this might result to hours and hours of fun in the kitchen. So here goes....

For the dough, you will need flour, salt and water. I used 2:1:1 ratio - 2 parts flour, 1 part salt, 1 part water. Mix the dry ingredients and add the water slowly. You don't need to put in all the water.

Knead the dough and flatten with a rolling pin just like how you'd make sugar cookies. Cut out the shapes using your cookie cutters. You can use whatever shapes and sizes you want. There is no hard and fast rule as to what you can use. I used Christmas cookie cutters.

006 ps1


When you'll find the dough starts to dry and become a tad difficult to knead, add some water until you get the desired consistency - wet enough that it doesn't crack when you knead.


For the ribbon hole, you can use drinking straw to poke the hole. This way, you'll have a perfect tiny circle.


To embellish, you can stamp or even draw on them. You can also use glitters if you want. You can do however way you want to prettify them. I used my Christmas-themed rubber stamps. Because I am going to hang these ornaments on the Christmas tree by our old leather couch in the living room, I decided to use burgundy to go matchy-matchy with our leather couch. I didn't have burgundy ink so I used food colour in lieu of a regular ink. You can also use acrylic paint.

014 ps1


To dry these ornaments, you can either "bake" (set it to the lowest possible temperature) until they're dry. Or you can just air-dry them. Again, there are no set rules as to how you'll dry them as long as they're dry and have hardened enough when you hang these little beauties.


And one more thing - you can add some cinnamon powder in your dough mixture. I did that in all the batches I've done. It smells like ginger bread cookies in the room when they're hung. And it also adds a "vintage" look because of the brown specks.

salt dough 1


So there you have it. Enjoy!

Monday, November 4, 2013

Over a slice of brownie

I had fun hanging out with some of our closest friends last night. And as always, over a big meal and sumptuous desserts, we talked about our favourite topics - the kids, our husbands. In between these topics, some new jokes were told, old ones were retold. Added to that, health concerns were discussed, the whole she-bang ;). All in all, life is good. It's not perfect, but good overall. Nobody needs it to be perfect anyways. So....

069 ps2


I made some brownies and shared it with my friends last night. I made it more decadent by adding some roasted pecans and topped it with cheesecake swirls. For the cheesecake swirls, just beat together 250 grams of Philly cream cheese, 1/3 cup sugar and 1 egg. Spread it on top of your brownie batter and make some swirls by using a spatula or a barbecue stick. I used chopsticks and they worked like a charm. Bake like you would bake a regular brownie. If you want a brownie recipe, you can try this.

It's good to serve these brownies warm with a scoop or two of vanilla ice cream. With a glass of cold milk is how I like it especially on a quiet weekend afternoon.

Sunday, September 15, 2013

Inspiration

It's amazing sometimes how inspiration comes from unexpected places, books, things, persons or what have you. This time, it came from Vicente Wolf. And you might think it's a design inspiration but it's not. It's an inspiration (and a reminder) on how life should be lived.

078 ps3


"... Wait a minute. I'm walking on the flat part now, and it's actually kind of pleasant. The clouds just parted, the sun came out, and I can feel the warmth on my skin. Why don't I enjoy it, instead of worrying about what's up ahead?

"The future will always be just out of reach. You'll get there eventually, and it may not be as bad as you think. But in the meantime, don't miss the here and now. Live in the moment. That's what's important. What am I doing today? How can I use my energies?

... There is always a before and an after; but the point is to be present and aware for all the moments in between."
 ~ Vicente Wolf, Lifting the Curtain on Design

I know the message has been uttered, written, sung, rapped in many different words and ways. But it was the words of Vicente, the inveterate traveler, magnificent photographer, and thoughtful designer that have struck me the most. (Is it becoming obvious now that I'm a big fan?) Maybe because I've come across them at a time when I'm desperately hanging by a thread on something that's very dear and important to me. I don't know. But one thing I know, in time, things will be in their places; right where and when they're supposed to be. However we'll get there is for us to do, endure, enjoy, learn and savour.

And speaking of savour, here's another recipe I'm going to share - the Opera Torte. This has been a big hit at home. Both my royal tasters gave this recipe a big thumbs up. And I've already received an order from MDH for his birthday next year. It took me hours doing this beautiful and tasty thing in my favourite kitchen. But that's because I like being in my kitchen and I wanted to relish every unhurried moment I have whipping up something beau et délicieux.

Okay, you may choose to disregard the last sentence I just wrote. Or you can use the same reason to bake this pretty thing because I am going to warn you that this recipe does take hours to make. But I am going to assure you that it will be worth it.


069 ps2
L'Opera Torte

Ingredients


Jaconde Cake
  • 2 large eggs, separated and at room temperature
  • 1 large whole egg, at room temperature
  • 1/4 cup + 2 Tbsp sugar
  • 2/3 cup ground almonds
  • 6 tablespoons cake and pastry flour, sifted
Ganache Layer and Glaze
  • 1 cup whipping cream
  • 8 ounces bittersweet chocolate, chopped
  • 2 ounces coating chocolate OR chocolate chips
  • 2 tablespoons vegetable oil
Coffee Buttercream
  • 2 egg whites, at room temperature
  • 2 Tbsp + 1/2 cup sugar
  • 1 cup unsalted butter, at room temperature
  • 1 tablespoon coffee extract (or 1 Tbsp very strongly brewed espresso, cooled)
  • 1 teaspoon vanilla extract
Coffee Syrup and Garnish
  • 1/2 cup hot coffee
  • 3 tablespoons sugar
  • 1 1/2 ounces coating chocolate, melted
  • chocolate covered coffee beans


034 ps2


Directions

  1. Preheat the oven to 400 F and line an 11-x-17-inch sheet pan with parchment paper.
  2. Whip the 2 egg yolks and the whole egg with the ¼ cup of sugar until it is thick, pale and holds a ribbon when the beaters are lifted. In a separate bowl, stir the ground almonds and flour together.
  3. In another bowl, whip the 2 egg whites until foamy, then slowly add the remaining 2 Tbsp of sugar, whipping until they hold a soft peak when the beaters are lifted. Fold the whipped whites into the yolks in 2 additions, then fold in the almond mixture. Spread this evenly over the prepared sheet pan, ensuring that the batter is as level as possible (the batter will only make a thin layer). Bake the cake for about 8 minutes, until golden brown and allow to cool. Once cooled, the cake make dry a bit – that is expected.
  4. For the ganache, heat the cream until it just begins to simmer and then pour this over the 8 ounces of chopped chocolate. Let this sit a minute, then gently stir with a spatula starting at the centre and widening the circles until the chocolate has fully melted and the ganache is smooth. Set aside to cool to room temperature.
  5. For the buttercream, place the egg whites in a bowl and whip with the 2 Tbsp of sugar until just past foamy. Place the remaining ½ cup of sugar in a small pot with 2 Tbsp of water and bring to a full boil over high heat, boiling until the sugar hits 240 F on a candy thermometer. With the mixer on medium speed, carefully add the hot sugar to the whipped whites by pouring it down the side of the bowl (this helps to avoid splashing), then increase the speed and whip until the whites have cooled to room temperature, about 4 minutes. While beating, add the butter a few pieces at a time until combined. While adding the butter, if it appears that the buttercream is not fluffy, or seems curdled, not to worry - simply keep adding the butter, continue to beat and it will come together. There is no risk of overbeating. Add the coffee extract (or espresso) and the vanilla and use at room temperature.
  6. For the coffee syrup, stir the coffee and sugar together until the sugar dissolves.
  7. For the assembly, remove the sheet of cake and cut into three rectangles (about 6-x-11-inches). Brush the bottom of one of the layers with the melted coating chocolate and let this set until firm (or chill 3 minutes). Place this layer, chocolate-side down onto a flat cake board or platter. Brush the layer with coffee syrup, then spread half of the butter cream on top. Top this with a second cake layer, brush it with syrup and now spread two thirds of the cooled (but still spreadable) ganache layer over the cake. Place the final cake layer over the ganache, brush it with syrup and spread the remaining half of the butter cream on top (or you can save about 1/4 cup for garnish).
  8. For the ganache glaze, re-warm the remaining one third of the ganache, adding the coating chocolate and vegetable oil, stirring until smooth. Spread this over the top of the cake (but not the sides), and chill until set, about 2 hours.
  9. Before serving, trim the sides away to reveal clean layers, then slice into rectangle portions (a hot, dry knife makes this easy). If you wish, pipe a little coffee buttercream on top of each and place a coffee bean on top.
Source: Opera Torte by Anna Olson


Wednesday, August 28, 2013

My beloved Philippines (Pilipinas kong mahal)

The travel fairies (are there such things?) are on my side this summer. Not only did we get to celebrate our anniversary in Paris for a week, an opportunity came for me to visit my sister and nephews in the Philippines.

Travel to the Philippines requires at least 22 hours, which felt very long as I traveled by myself this time. I am not the most patient person so you can just imagine the tosses and turns I did on the plane and in lobbies during layovers. I had watched 5 movies, 3 documentaries and several sitcoms. It didn't help that I found it extremely difficult to fall asleep. The longest time that I had dozed off while on board was 2 hours, I think. And that was just on my way to the Philippines! Double that to account for the additional 22 hour (at least) travel coming back.

BUT the wonderful time I had with my nephews, some family members and old-time friends more than made up for the very long travel. Add to that the beautiful, familiar sights. Okay, this part, I will let some of my photos do the talking because I will not be able to aptly describe them through words.


This was my first "breakfast" inside Manila's domestic airport while waiting for the early flight to my final destination (that was another 4 hours of wait plus airtime right there). I would have wanted a traditional Filipino breakfast (TFB) but I couldn't find any close to my boarding gate and I was already extremely exhausted to scour for TFB. I thought there will be plenty of that coming.

002 ps1


I took these pics shortly before we land which was around 7 am. This was the last leg of my airplane ride. After that was another 2 hour drive to a special place I call "my first home".

phil skies 2


On the way to my sister's place coming from the airport, we stopped at this seafood place where they cook fresh catch of the morning/day. It's by the sea and so not only did I get a sumptuous fresh seafood brunch (with tropical fruits on the side), I got treated to this magnificent view.

032 ps1


I stayed with my sister and her family during my visit. The house was where I grew up and is my first home. While it is now my sister's (and her family's) home and some parts of the house have changed thru the years, some nooks and crannies of the house feel and look the same and make me feel quite nostalgic.
115 ps1
Sam, a new addition to the household. He wasn't around in my previous visit.


On the second day of my visit, I watched a part of the annual city Kaliga festival. It's a thanksgiving celebration and a way for the city to commemorate and honour its early settlers and ancestors.

I like this boy. He gamely posed to everyone's delight. He exhibits the residents' joie de vivre attitude to life in general.

Kaliga Festival 2


The sight of lush, green mountains is very common. Coconut by-products are some of the region's merchandise and you can see why from this pic.

206 ps1


If the sight and sound of the seawater relax you, there are beaches along the China sea or Pacific ocean (depending on which side of the coast you're at) that are always there waiting for you to be drawn in by their peaceful charm.


Duka Bay 1
sea ps1

On days when the sun is out, walking along the beach, fishing, or maybe just goofing around with friends is enough to while away a weekend afternoon.

168 ps2
I took this shot while waiting for our lunch


Every visit to the Philippines, specifically Manila, is not complete without paying homage to our (MDH's and my) beloved university. It's where MDH and I met and where we met some of the wonderful, smart, funny, and loving friends we've kept over the years.

UP ps1


And what's a visit to Manila without some shopping. Well, it was mostly window shopping for me, but shopping nevertheless. I couldn't put these items down when I spotted them inside a shop called 'Kultura'. It's a very ingenious way of recycling old newspapers and magazine prints. I shouldn't be surprised, really. Afterall, Filipinos are known for their ingenuity and creativity.
016 ps1


Thursday, June 13, 2013

Chocolate high

All the chocolate goodness that you are about to see came from our kitchen. I made most of them except the last one.  I took all the pics with one of my fave lenses, the Nikon macro 105 mm. And the song is by India Arie.

You see, when I grow up, I wanna be a chocolatière. And a photographer too. The singing, I don't think I can pull it off so I leave that to India Arie.

Amusez-vous!


021 ps2
I used a template for the piped garnish. I enjoyed making these pretty little things


I don't mean to be decadent
I might sound like a hedonist
But the simplest way I can put it
You become a habit
The more I consume, the more I gotta have it
Ain't no such thing as too much
If you gave me everything it'd never be enough yeah
My black coffee with sugar no cream in the morning
You're my super double caffeine dream yeah


pain au chocolat 1
I used Belgian chocolate for these.


Your precious darkness got me so
Strung out and lovin' the way that you
Got me so wide open, my baby doll
Jonesin' and fienin' under my skin
My nerves are screamin' when you're not here
See baby I need ya sugar
You're so delicious

choco 1
Both white and milk choco have pistachios and cranberries.


There is somethin' about your love
That makes me just want to open up
Your flavor is the sweetest thing in life
I'm addicted to your chocolate high

102 ps2
Cake pops. They're made of gooey brownies inside. Instant hit.


I be trippin' in so many ways if I
Go a single day without a taste of your love
The finest cuisine of today's world
Five stars, oh you're so gourmet

orange
These are white choco with candied orange peels. I made the candied peels.


I crave you, I want you
Every cell in my body needs you
Tasty like hershey's and nestle
You're rich like godiva

080 ps2
It's this year's birthday cupcake for MDK


There is somethin' about your love
That makes me just want to open up
Your flavor is the sweetest thing in life
I'm addicted to your chocolate high
Cause I want you, and I know that you want me
So let's stay close like we supposed to be
And just get high off our own supply
I'm addicted to your chocolate high


006 ps1
My boys brought home a box of See's chocolates from Omaha, Nebraska. It's what I got while they got to attend their first AGM with Warren Buffett and Charlie Munger :)

Your flavor is
The sweetest thing in life
And I don't ever want to come down
I'm addicted to your chocolate high
Oh yeah

Thursday, May 23, 2013

Happy, happy

It doesn't take much to make me happy. Don't ask MDH though, he'll tell you otherwise hahaha. For some odd reason, he thinks I'm high maintenance.


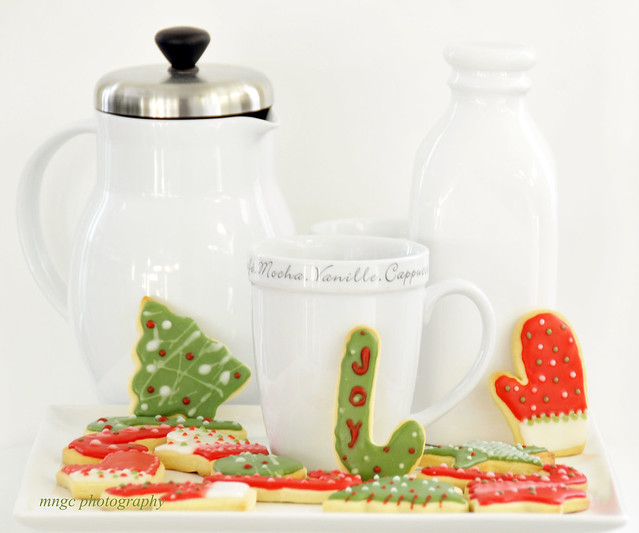
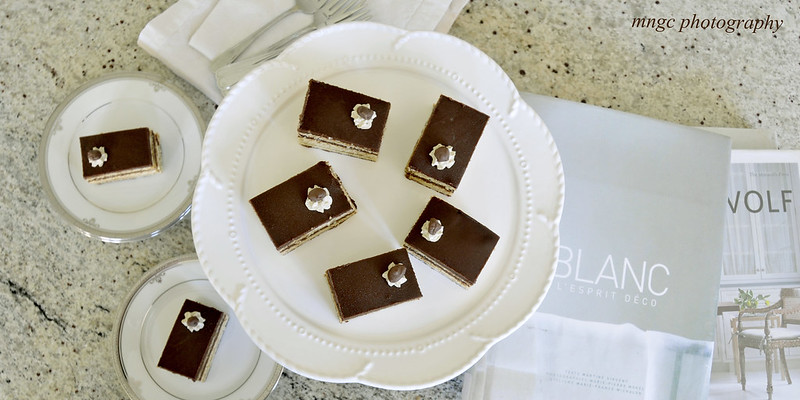
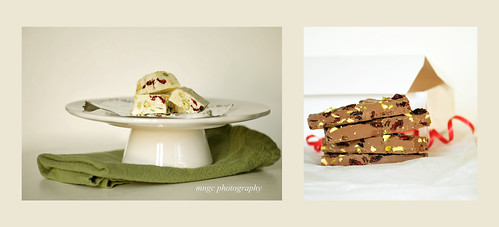
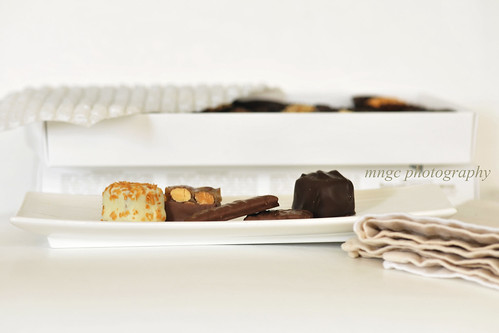
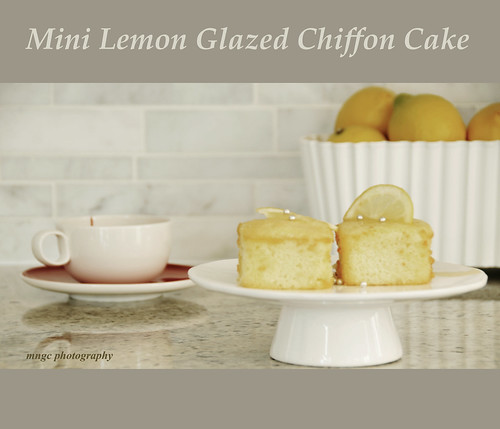
A happy day for me is having the time to linger in our kitchen, try out some recipes while listening to our fave songs or listening to my boys' jokes and getting the big okay for the new recipes from them. And then take some food shots just like the one below.

Linzer cookies 2
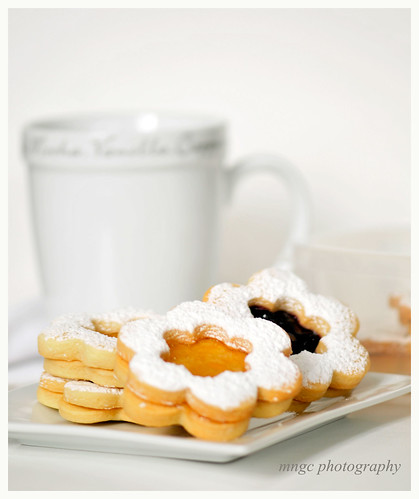
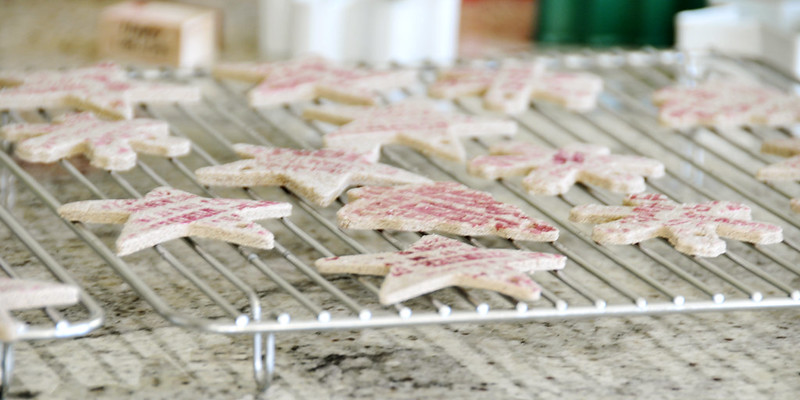
I made these Linzer Cookies


Another happy day for me is having an unplanned trip and not have to worry about the details. Something like we did last Sunday....

We went for a quick trip to Montreal over the long weekend. It was just MDH and me. And this time, we agreed not to plan ahead the places we'd go other than our first stop which was at St Joseph's Oratory. Oftentimes, the planning thing stresses me out which I thought would be counter-productive and undermine the reason for this quick trip.

So where did we end up going? Everywhere but the places we've been to many times in our previous visits especially the "must-see" touristy spots. It's where we usually bring first-time visitors on the few occasions when we play "tour guides." We made 3 discoveries (well, not exactly our discoveries because I kind of sourced the info from here):

1. The Underground shopping - I don't know why we didn't learn about this. Apparently anyone who likes to shop for clothes and stuff knows about this place. I didn't so I guess I don't qualify in the 'anyone who likes to shop...' category. After an hour of walking inside, I wanted to get out. There was hardly any store that I wanted to linger in. But I didn't get out empty handed. I got a $9.00 scarf. Quite a bargain if you ask me.

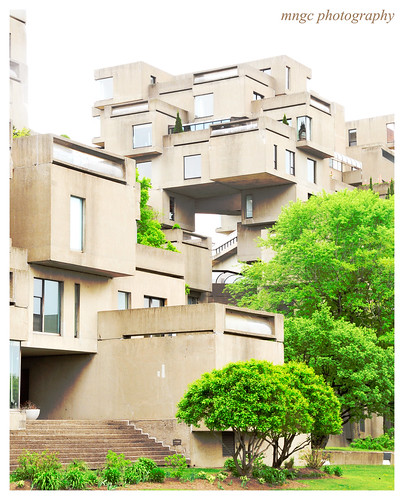
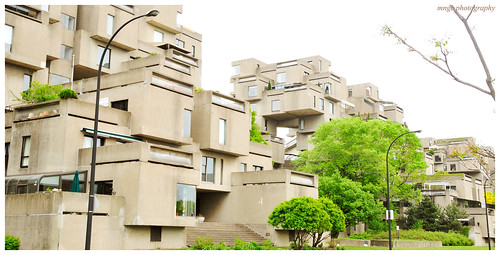
2. Habitat 67 - I love how the units are strategically stacked on top of each other and managed to have sufficient number of windows for each unit.
Habitat 67 1


One side of the building faces the St Lawrence River (where the big ships are moored). The downtown city skyline can be seen from that side as well, so overall, it's not too bad a sight for anyone on that side.

Habitat 67 2


3. The sculptures in Rene Levesque Park - We didn't get to see all 22 sculptures because by the time we got there, it was already raining and it was just too wet to walk around. MDH was kind enough to hold a big umbrella so I can still take a few pictures.

Rene Levesque park


4. Pâtisserie de Gascogne - We had the most delicious chocolatine (also known as pain au chocolat) and a piece of almond pastry here. We brought some pieces for MDK to sample.

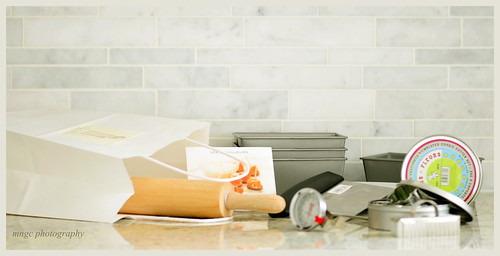
5. Les Touilleurs - What can I say, it's a candy store for someone who loves kitchen gadgets. Of course, I didn't get out empty handed.

108 ps3
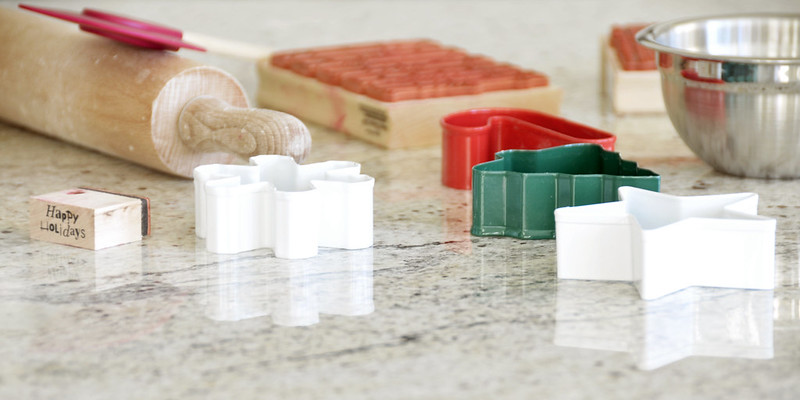
My loot: a smaller and lighter rolling pin; small loaf pans; sets of teardrop and flower cookie cutters in different sizes; candy thermometer (my old one broke when I made peanut brittle last week); dough cutter; and shortbread cutter

The following day, I took out my new cookie cutters for a spin and made some Linzer cookies. The cookies turned out pretty and tasty. And like usual, here's the recipe in case you want to try it out at home -

Linzer cookies 2

 Ingredients:
 1 cup unsalted butter, room temperature
 1 1/2 cups icing sugar, sifted, plus extra for dusting
 4 large egg yolks
 1 teaspoon finely grated lemon zest
 1 teaspoon vanilla extract
 1/4 teaspoon almond extract
 3/4 cup ground almonds
 3 cups cake and pastry flour
 1/4 teaspoon baking powder
 1/4 teaspoon salt
 Jam
   
Directions:
1. Beat the butter and icing sugar until light and fluffy. Beat in the egg yolks and then add the lemon zest, vanilla and almond extract. Beat in the ground almonds.

2. In a separate bowl, sift the flour with the baking powder and salt and add this to the butter mixture, stirring until blended. Shape the dough into 2 discs (the dough will be soft), wrap and chill until firm, at least an hour.

3. Preheat the oven to 375 F and line 2 baking trays with parchment paper.

4. Knead the cookie dough a little to soften it (this will help prevent the dough from cracking when rolled). Roll out the first disc on a lightly floured surface and cut out cookies using a 2-inch teardrop or flower cutter and place these on one baking tray (the dough can be re-rolled). Roll out the second disc, cut out cookies using the same cutter, then cut a hole in the centre of each of these using a cutter a 1/2-inch smaller and place on the second tray. Repeat with any remaining dough, keeping track so you have the same number of tops and bottoms.

5. Bake the cookies for about 15 minutes, letting the cookies without holes remain in the oven an extra 2 minutes. Cool the cookies on the tray before filling.

6. Sift icing sugar over the cookies with the holes. Stir the jam to soften and spread a teaspoonful of it over the bottom of the base cookie. Gently press a dusted cookie on top and continue to fill the others.

Let them set for about an hour before storing in an airtight container.

Sunday, April 28, 2013

Waiting for that sunshine to come

Those sunshiny days have been quite elusive lately.

And so while waiting for it to come, I decided to do the thing that makes me happy - whip up something in the kitchen, take a photo of it, and share.

chiffon


This recipe makes 24 2-inch mini squares. Muffin pans can also be used in place of the square tins.

Ingredients:

Chiffon Cake
2 1/4 Cups flour
1/2 Cup sugar
3 Tsp baking powder
1/2 Cup oil
7 Egg yolks
3/4 Cup water
1 Tsp vanilla
7 Egg whites
1 Tsp cream of tartar
1 1/2 Cups sugar

Glaze
1 Cup sugar
1/3 Cup lemon juice
1/3 Cup sugar

Directions:

Chiffon Cake
1. Preheat oven to 325 degrees F.
2. Sift together flour, sugar and baking powder in a bowl. Add the oil, egg yolks, water and vanilla. Blend well until the mixture is smooth.
3. Beat egg whites with cream of tartar until soft peaks form. Gradually add sugar and continue beating until stiff but not dry.
4. Fold in the egg yolk mixture.
5. Pour into the tins and bake for 16 to 18 minutes or until the mini cakes turn golden brown. Cool the cake before drizzling with the lemon glaze.

Lemon Glaze
1. Heat the sugar and lemon in a sauce pan until the mixture starts to simmer and sugar has melted. Set aside and
let it cool to room temperature.
2. Once the sugar and lemon mixture is at room temperature, pour the additional sugar.

To assemble:
Drizzle the mini cakes with the glaze. You can use lemon candies and silver or white dragées for the garnish.

Nice to have these with tea or coffee. Even better to be had in a company of someone who knows just the magic word to say or act to do to make you see those happy rays of sunshine once again.


Friday, April 19, 2013

Today's Show and Tell: Home Office


Today, I am going to show you MDH's office/study at home. But before we delve into that, let me show you our respective work areas during the past weeks that I stayed home. Some days, MDH worked from home to keep me company.

His and hers 2
I like the contrasts in how the two areas are being setup
I had temporarily converted my dresser into my work area as it is conveniently located close to the bed. On normal days, I mainly work in the kitchen, the chef's desk as my work and play (more like play) area. MDH works in the study, his home office. He rarely works from home now, but on occasions when he has to, he's in the study. Door is oftentimes closed as it can get noisy in there especially when he is in teleconferences.

I don't think I've shown this part of our home. If I have, feel free to scroll down quickly and skip the pic below :).


study2


When you are standing in the main hallway or in the kitchen, you get a glimpse of the desk (and MDH if he's inside working) in the study. It's also a favourite hangout of the kids (mostly teenagers now) when they're not in the basement or in the loft during get-togethers at our place. I think they listen to music, watch movies from the computer, surf the net and do other stuff that teens like to do while their parents are also having fun hanging out :). So yeah, on some nights, you see it packed with kids.

Inside, the furniture pieces are strategically placed on the sides. It's not a huge area, so there's not a lot of floor space to work with. We originally placed the desk by the window so MDH can have the view outside. However, that decision was scrapped as the very first thing you'd notice are the hideous wires dangling under the table. Not a pretty sight. So we have it facing the wall (with the world map on it). Better placement, I think.

study 3

There is a small cabinet on the corner wall where we put our "everyday" stuff and things that need to be sorted out to put in their more permanent spots (e.g. camera bag and tripod are going down the basement when they are not in use). Real estate is prime in the study, not so much in our unfinished basement (I'm still dreaming to have it finished btw ;)). So whatever's not used goes to either the basement or onto the "donate" bin. We've learned not to hoard and hold on to stuff we don't use.


study 6

These are the shelves we installed in the study. They're from Ikea, the Billy series.  We have similar bookshelves in the loft but in white.

The study is still a work in progress just like the other rooms in the house. For one, I want to change the wall paint. But that will have to wait I guess as the laundry and deck are on top of our projects this year. We'll see. For now, we're happy with the way it is.


study